Description
ADL UT 35 in Uzbekistan, Tashkent
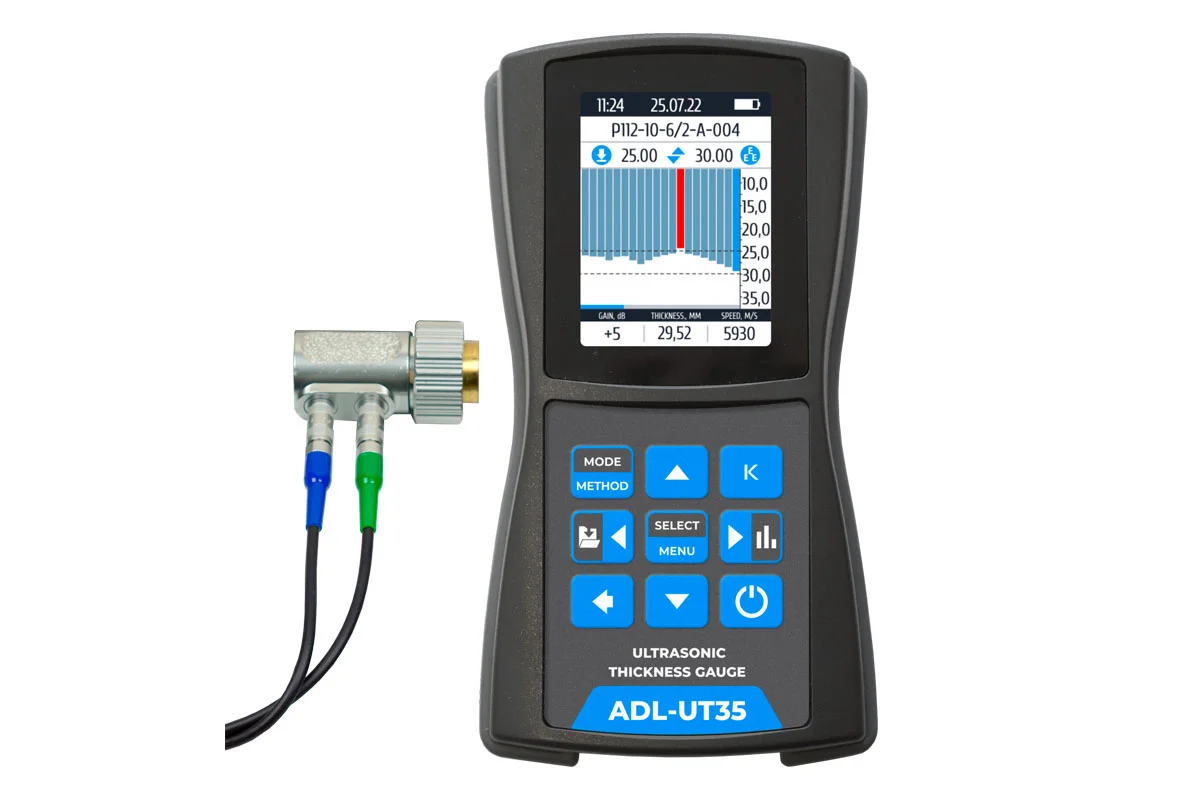
The ultrasonic thickness gauge ADL UT 35 is designed for measuring the thickness of products and structures made of metal alloys and isotropic non-metallic materials with one-sided access to them.
The ADL UT 35 thickness gauge is often used for rapid measurement of the thickness of products made of various materials subject to corrosion, erosion, internal deposits, including those with a coarse-grained structure, metal and non-metal products: sheets, containers, pipes, pipelines, bridges, housings, transport and others structures during their operation to determine the corrosion state or after their manufacture.
The advantages of the thickness gauge are presentation of the signal in the form of an A-scan, control of thickness through the coating, construction of a thickness profile of the controlled surface (B-scan), measurement of ultra-small thicknesses, wide functional amplification of the useful signal, simple device setup, bright and colorful display, various thickness measurement modes , a wide library of sensors, the ability to work with any converters.
It doesn’t matter if it is flat or curved, you will get the exact thickness. With the UT 35 thickness gauge, you can use any ultrasonic transducers with frequencies from 0.5 to 15 MHz, both combined (including with delay lines) and separate-combined (separate) types.
The thickness gauge provides various thickness control capabilities – high-precision measurement of zero crossing time, measurement of time between echo-echo signals, measurement of metal thickness under coatings, etc.
The presence of a real signal on the screen eliminates typical errors in thickness measurements using ultrasonic testing and increases the accuracy of measurements.
Features of the UT 35 thickness gauge:
- Measurement range from 0.4 to 600 mm;
- Auto-detection of connected converters with built-in memory;
- Connecting high-temperature converters up to 350 °C;
- Measurement methods:
Pulse – Echo – classic method
Echo-Echo-Echo measurements – measurement of metal thickness through the coating; - Graphical display and saving of scans A and B;
- Connecting a wide range of converters (both combined and separate-combined);
- Ability to set thickness tolerances (upper and lower values)
- High speed of measurements and processing due to a powerful microcontroller and additional RAM;
- Ability to calibrate both the speed of ultrasound in the material and the thickness of the material.
- Reliable shockproof, dust- and moisture-proof housing;
- Stores a large number of measurement results, including scans A and B;
- Specialized software;
- High-contrast color display with adjustable brightness;
- Data transfer to PC via standard USB-C connectors;
- Possibility of measuring thickness through the coating without cleaning the surface
- The presence of a B-scan, which allows you to build an accurate and visually understandable profile of the bottom of the product with recording of the minimum signal for the entire scanning time. This feature allows you to quickly scan large areas.
- The presence of a signal in the form of an A-scan, which eliminates measurement error, because The operator understands from the mark on the scan in which zone the measurement was made, in contrast to the traditional digital one (the typical error is doubling the thickness), resulting in increased measurement accuracy.
- In the setup mode, the full range of options is available for adjusting the gain of the receiving path, AGC, TCG, generator and receiver parameters, calibrating the prismatic delay and material rotation speed, and so on.
- Highly accurate zero-crossing measurement, two independent gates and a state-of-the-art low-noise receiver enable precision measurements of ultra-thin thicknesses with combined transducers in echo-echo-echo mode, including under a variety of coatings.
- “DIGIT”mode allows you to remove unnecessary information from the screen for typical traditional applications, turning a good technical device into an easy-to-use management tool.
- In the TABLE mode, the user can create a tabular matrix for monitoring large-sized standard products by marking control points. This set of results can be transferred to a PC for subsequent statistical analysis.
- Thanks to the sensor library, setting up the device is quick and easy.
High reliability and safety, which is very convenient when working in workshops. - Convenient mount on the operator’s hand, which greatly facilitates work in hard-to-reach places or at heights when the operator needs his hands free.
The “Ultrasonic Thickness Gauge ADL UT 35” is a specific model of ultrasonic thickness gauge, likely manufactured by ADL, a company specializing in precision measurement instruments. Here’s some information about it:
- Ultrasonic Technology: Ultrasonic thickness gauges like the UT 35 use ultrasonic waves to measure the thickness of materials. They work by sending pulses of ultrasound through the material and measuring the time it takes for the pulses to return.
- Model Name: “ADL UT 35” denotes the model number or designation of this particular ultrasonic thickness gauge.
- Measurement Range: The UT 35 would have a specified measurement range, indicating the minimum and maximum thickness of materials it can accurately measure.
- Accuracy: The device’s specifications would include its accuracy in measuring thickness, typically expressed as a percentage of the measured value or in millimeters.
- Display: The UT 35 would feature a display screen where measurement readings and settings are shown, allowing users to easily view the results.
- User Interface: It would have controls and buttons for operation and configuration, allowing users to select measurement modes, adjust settings, and view readings.
- Transducer: The UT 35 would come with a transducer, which is the part of the device that emits and receives ultrasonic waves. The transducer is placed on the surface of the material being measured.
- Battery Power: The UT 35 likely operates on battery power, allowing it to be used in various locations without the need for a power outlet.
- Applications: Ultrasonic thickness gauges like the UT 35 are used in various industries such as manufacturing, aerospace, oil and gas, automotive, and maritime for measuring the thickness of materials like metal, plastic, glass, and composites.
- Data Logging: Some models may have the capability to store measurement data for later analysis or reporting.
- Calibration: Periodic calibration is necessary to ensure the accuracy of the measurements. The UT 35 would likely come with instructions for calibration or may need to be calibrated by a certified technician.
Overall, the Ultrasonic Thickness Gauge ADL UT 35 is a portable and versatile tool used for non-destructive thickness measurement in a wide range of industrial applications.
Products in category Unbrakable control


